
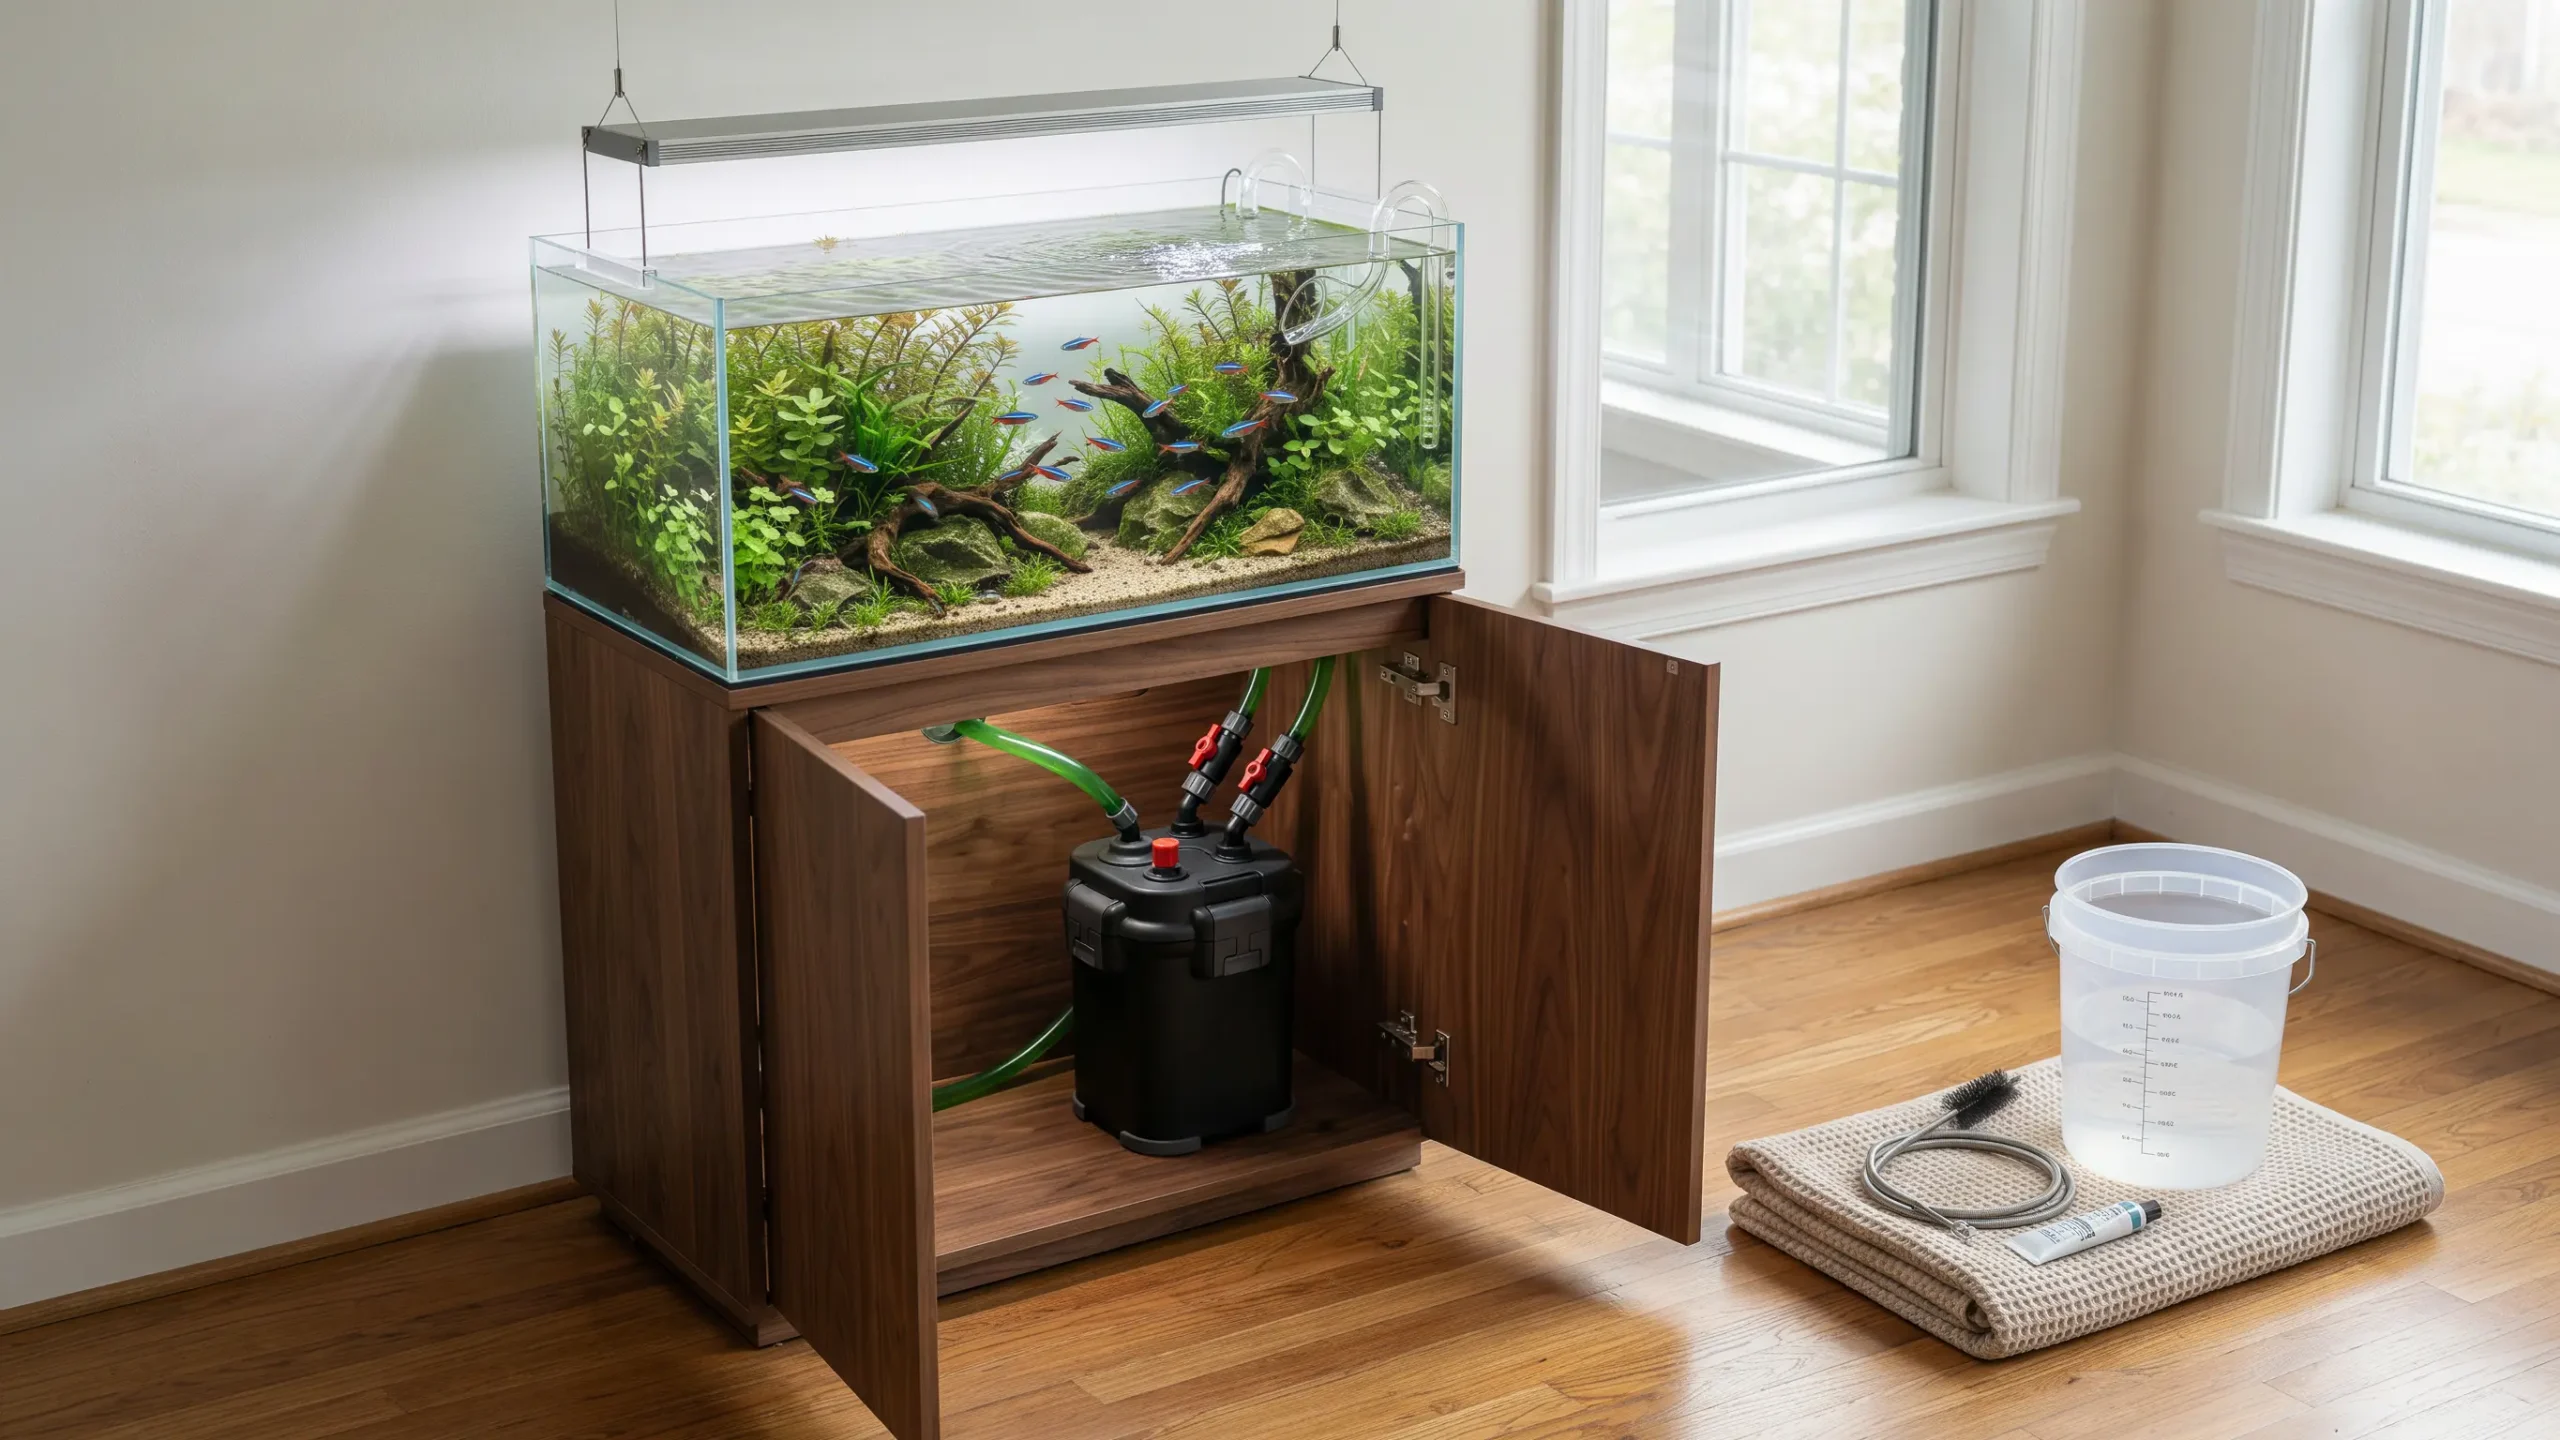
When your external filter output fades from a brisk current to a weak trickle, finding a dependable canister filter reduced flow fix becomes urgent—not only to clear suspended waste, but to keep oxygen-rich water flowing across your biological filter bed. Many aquarists immediately suspect a dying pump motor and begin pricing replacement units, yet service-bench experience consistently shows that most weak-flow canisters require zero new parts. If you are wondering why is my aquarium filter losing flow rate strength—whether turnover declined gradually over several months or plummeted right after routine maintenance—the real cause is almost always hidden hydraulic friction, biofilm-coated hoses, trapped airlocks, or impeller drag rather than a burned-out motor.
This engineering-backed troubleshooting guide walks you step by step from the fastest zero-cost external checks to deep hydraulic, impeller, and inline-plumbing fixes—while safeguarding the living nitrifying bacteria keeping your fish alive.
Table of Contents
First Things First: Safety, Fish Oxygenation, and Measuring Real Flow
Before unlatching a single motor-head clamp to start your canister filter reduced flow fix, protect your livestock and verify whether your external filter has genuinely lost circulation or is simply delivering its normal loaded output.
Emergency Fish and Electrical Safety Checks
If fish are gasping at the surface or breathing rapidly, restoring visible water movement does not immediately guarantee safe water chemistry—follow our emergency steps for fixing fish gasping at the water surface first. Run a backup airstone or manually agitate the surface with a clean cup right away, and test water temperature, ammonia, and nitrite. Whenever you troubleshoot a sluggish aquarium filter, observe non-negotiable electrical safety rules:
- Disconnect mains power with dry hands before touching water or hoses, and confirm your outlet uses a Ground Fault Circuit Interrupter (GFCI) with a proper drip loop hanging below the wall socket.
- Stop immediately if you detect a burning odor or see water near cables; isolate power from a dry circuit breaker rather than pulling a wet plug.
- Never run a canister pump dry—even brief dry operation overheats the impeller cavity and can permanently warp internal plastic components.
- Wait 30 seconds after any power outage or surge before plugging the filter back in so internal motor capacitors discharge completely instead of locking the rotor on restart.
- Allow a 20-minute cool-down if the motor head feels hot and cycles off intermittently; internal thermal protection frequently trips when impeller drag forces the motor beyond its rated load.
Rated vs. Real-World Flow: Why a 28% to 41% Drop Out of the Box Is Normal
One of the most frequent mistakes when diagnosing why is my aquarium filter losing flow rate strength is judging live aquarium output against the headline gallons-per-hour (GPH) or liters-per-hour (LPH) rating printed on the box.
Manufacturers typically test headline pump output using an empty canister, zero filter media, and no hoses attached. The moment you install sponges, biomedia baskets, valves, and plumbing, factory-verified loaded filter circulation immediately drops by 27.8% to 41.3%—settling around 59% to 72% of the empty pump rating when spotless, and closer to 40% to 60% in typical home setups with longer hoses and maturing media.
Even high-output flagship units exhibit substantial built-in hydraulic drag: a brand-new Fluval 407 drops from 383 GPH empty to 245 GPH loaded (a 36.0% reduction), while an FX6 steps down from 925 GPH empty to 563 GPH loaded (a 39.1% reduction). Whenever a brand publishes only a single maximum flow rating—as Eheim and Oase commonly do on specification sheets—treat that number as an empty-pump ceiling rather than expected real-world flow.
The 60-Second Timed Bucket Test
Eliminate guesswork by measuring your canister’s real-world GPH flow rate right after a thorough cleaning to lock in a personal baseline, then retest whenever circulation looks sluggish:
- Direct the filter’s return outlet into an empty 5-gallon (or 10-liter) bucket held near aquarium water level.
- Time exactly how many seconds it takes to fill the container to the marked volume line.
- Calculate real flow using the volumetric rate formula:
Actual GPH = (Gallons Collected ÷ Seconds to Fill) × 3600
For instance, filling a 5-gallon bucket in 45 seconds equals (5 ÷ 45) × 3600 = 400 GPH, whereas 60 seconds equals 300 GPH. For metric tanks, use (Liters Collected ÷ Seconds) × 3600 = Actual LPH.
Key diagnostic threshold: A flow drop of 30% or more below your freshly cleaned baseline—or actual output falling below 40% of the filter’s advertised empty rating—confirms an active hydraulic restriction that requires troubleshooting rather than waiting for a scheduled maintenance date.
Timing-Based Triage: Narrow Down the Fault in 10 Seconds
Before disassembling your filter, match when the flow declined to the most likely root cause, and adjust only one variable at a time, observing the return stream for a full minute between checks:
- Gradual decline over weeks or months: Points to progressive mechanical clogging, a saturated pre-filter sponge, biofilm narrowing inside hoses, calcium scaling on the impeller shaft, or impeller blade wear.
- Immediate drop right after cleaning or a water change: Points to trapped air in the motor head, misaligned media baskets, fine filter floss packed too tightly, a dry or twisted head O-ring, or quick-disconnect valves not reopened to full bore.
- Sudden drop after adding hardware or scaping: Points to an inline accessory (UV sterilizer, inline heater, CO2 reactor, chiller) introducing backpressure, a pinched hose behind the stand, or a smaller mismatched return nozzle.
- Always weak since day one: Points to normal loaded-filter expectations versus empty box specs, excessive tubing loops and bends, or an undersized canister for the aquarium’s volume and bioload.
The 9-Step Canister Filter Reduced Flow Fix (Cheapest to Deepest)
Work through these nine diagnostic steps in strict order to complete a lasting canister filter reduced flow fix. Starting at the cheapest, most accessible chokepoints resolves the majority of slow canister filter issues in minutes without buying a single replacement part.
Step 1: Clear the Intake Strainer, Pre-Filter Sponge, and Hidden Check Valves
Any restriction on the suction side starves the pump before water even enters the canister body. Start inside the tank before disconnecting a single hose:
- Inspect the intake strainer cage: Shed plant leaves, duckweed, Java fern fragments, uneaten food, and empty snail shells quickly form a tight mat across slotted strainer grids. Scrub the slots in a bucket of siphoned tank water. If food repeatedly clogs the strainer, scale back your feeding portions.
- Squeeze your pre-filter sponge—and audit its PPI density: A coarse 10 to 30 PPI (pores per inch) intake pre-filter sponge traps macro-waste before it enters the canister, but it needs squeezing every 1 to 2 weeks. If your filter uses an integrated pre-filter chamber equipped with dense 45 to 60 PPI stock foams (a frequent bottleneck reported by owners of stock Oase BioMaster units), those fine pores clog rapidly and starve circulation; replacing them with coarser 30 PPI pre-filter foams extends runtime substantially while preserving mechanical protection.
- Check inside the intake tube for hidden check valves and wedged snails: Pull off the lower strainer and peer up the intake pipe. Ramshorn snails, gravel, or hardscape fragments routinely lodge inside the curve. Older Fluval canisters and certain external pre-filter modules also house an internal ball check valve (marble) or valve flap to hold prime; accumulated biofilm and plant fibers frequently glue this valve partially shut. Disassemble the valve housing, flush it thoroughly while rolling the ball freely in every direction, and clean any pre-filter valve box before refitting.
- Confirm full pipe submersion: Verify that evaporation has not lowered the tank waterline below any intake joint, telescoping seam, or rubber hose adapter, which allows the suction line to ingest air instead of solid water.
Step 2: Verify Quick-Disconnect Valves and Output-Only Throttling Physics
Quick-disconnect shutoff taps and AquaStop blocks are among the most frequently overlooked flow bottlenecks. Because internal valve seals stiffen with biofilm and mineral scale over time, taps reopened hastily after servicing often stop three-quarters open—imposing an estimated ~20% flow penalty that nobody remembers setting. Confirm that both intake and discharge levers sit cleanly against their 100% full-open stops.
If you deliberately want gentler current for bettas, angelfish, or delicate planted aquascapes, following basic centrifugal pump physics protects your filter from accelerated mechanical wear:
- Never throttle the intake (suction) valve: Centrifugal canister pumps rely on sufficient Net Positive Suction Head (NPSH) at the center eye of the impeller so incoming water pressure stays safely above water’s vapor pressure. Choking the suction side—whether with a partially closed intake tap or a clogged ultra-fine intake sponge—drops local inlet pressure and generates microscopic vapor bubbles that collapse violently against spinning blades. This destructive process, known as cavitation, sounds like pumping gravel, slashes water output, and rapidly erodes impellers, shafts, and seals.
- Throttle strictly on the discharge (outlet) side—within manufacturer limits: Partially closing the outlet valve raises discharge resistance cleanly along the pump curve without starving the impeller eye. On models engineered for outlet throttling, such as the Fluval 07 series AquaStop block, Fluval confirms you can close the output lever up to a 45-degree angle (reducing flow by up to 50%). Never run a pump against a fully closed valve, as uncirculated motor energy quickly overheats trapped water.
- Prefer flow diffusion over valve restriction: Whenever feasible, leave all valves 100% open and disperse jet velocity inside the tank using a multi-hole spray bar aimed gently across the surface or toward the rear glass, or a flared glass lily pipe, maintaining healthy filter turnover without tossing fish around.
Step 3: Purge Trapped Airlocks and Fix Invisible Suction-Side Air Leaks
Air trapped beneath the motor head breaks the water column around the impeller, destroying pumping efficiency while creating rhythmic gurgling, rattling, or intermittent bursts of micro-bubbles from the return pipe.
- Follow model-specific priming procedures: Place the canister below aquarium water level so gravity assists siphoning, fill the canister with aquarium water to the manufacturer’s specified level (for instance, roughly halfway—5 L to 8 L—on Fluval FX2/FX4/FX6 models, or three-quarters to full on manual-prime canisters), open both valves completely, and pump the primer plunger firmly until solid water rises through the tubing. Critical priming detail: On Fluval 07 and FX series canisters, hold the output nozzle above the water surface during priming so trapped air vents effortlessly without fighting water backpressure. Keep in mind that Fluval FX Smart Pump models automatically pause for 1 to 2 minutes after plug-in and every 12 hours to evacuate trapped air—a normal programmed purge, not a pump stall.
- Burp stubborn air pockets gently: Once primed and running, tilt the canister gently front-to-back and side-to-side several times until trapped pockets beneath the media baskets burp out and motor sound smooths to a low hum.
- Track down invisible suction-side air leaks: A critical hydraulic rule catches many fishkeepers off guard: a leak on the suction (intake) line pulls air inward instead of leaking water outward, leaving your cabinet floor completely dry while your canister loses prime every few days. Wipe every intake fitting bone-dry with paper towel and recheck for faint moisture an hour later, inspect hose clamps and quick-connect collars, and replace hardened, inflexible rubber intake hose connectors every 6 to 12 months on high-output units (or every 1 to 2 years on lighter-duty canisters)—a leading cause of continuous fine air bubbles.
- Lubricate gaskets with food-grade silicone grease only: Pull the main motor-head O-ring and valve-block seals, swab both the rubber and receiving channel spotless with a damp cotton bud, and coat them thinly with food-grade or aquarium-safe silicone grease. Never use Vaseline, petroleum jelly, or vegetable oil, as petroleum and organic oils swell and degrade rubber elastomers, leading to flattened seals, air ingress, and floor leaks. Replace any flattened or cracked O-ring that fails to spring back to a round profile—manufacturers such as Fluval note that annual replacement is normal, while broader bench guidelines treat well-lubricated O-rings as 1-to-5-year wear parts.
- Balance glass lily pipe surface skimmers: On planted tanks equipped with inline glass skimmer intakes, excessive canister suction can drain the skimmer tube faster than water enters the lower intake slots, pulling the floating weir crown underwater so it bobs and gulps air straight into the impeller. Open the skimmer’s bottom bypass rod or lower intake valve to equalize hydrostatic pressure and stabilize the weir.
If surface slicks or bobbing inline skimmer intakes keep pulling air into your canister line, follow our dedicated troubleshooting walkthrough on setting up and tuning an aquarium biofilm surface skimmer.
Step 4: Unpack Media Compaction, Fix Stacking Order, and Stop Filter Bypass
Filter media does not merely trap solid waste—under constant hydraulic pressure, soft filter pads physically compress into an impermeable mat that stalls circulation. Worse still, when media baskets are overfilled or improperly seated, pressurized water forces its way around the trays rather than through them—a hidden malfunction called filter bypass, where return flow may appear decent even as tank water grows hazy with fine debris.
Verify three essential media configuration rules inside your canister:
- Follow strict coarse-to-fine-to-biological stacking in the true direction of water flow: Water must traverse Coarse Mechanical (10–20 PPI sponge) → Fine Mechanical (filter floss or 30 PPI polishing pad) → Biological Media (static K1 carriers, 20–30 PPI foam, sintered glass, or ceramic rings) → Chemical Media (activated carbon or synthetic resin). Placing fine polishing floss ahead of coarse sponge clogs the filter within days. To match your foam porosity, polishing layers, and high-void biomedia to your specific tank bioload without triggering clogging or channeling, review our complete best filter media guide for crystal clear aquarium water.
- Verify your specific brand’s internal water path: Never blindly mirror a generic stacking diagram. Classic Eheim, Penn-Plax Cascade, and many JBL units route water bottom-to-top (putting coarse foam in the bottom tray). By contrast, Fluval FX series canisters direct water down to the base, upward through perimeter foam inserts, and then top-to-bottom through the central baskets (placing fine polishing pads in the bottom center basket). Fluval 07 series units route water first through vertical pre-filter foam pads at the intake side (where shaped Bio-Foam Max pads fit strictly on the left side of the pre-filter cartridge) before rising through the central trays.
- Eliminate floss overpacking and spent foam collapse: Use only a single 1 to 2 cm layer of additive-free, unscented polyester filter floss—never a compressed wad—and discard and replace fine filter floss every 2 to 4 weeks once it turns dense and grey, since washing matted floss rarely restores porosity. Rinse coarse foams in siphoned aquarium water, replace aging sponges once they turn mushy and stop springing back, place all granular media (carbon, ammonia chips) inside fine mesh bags so loose grains cannot jam the impeller, and ensure every basket handle and inter-basket seal seats completely flush so the motor head closes without forcing the clamps.
Step 5: Deep-Clean the Impeller, Ceramic Shaft, Well, and Bushings
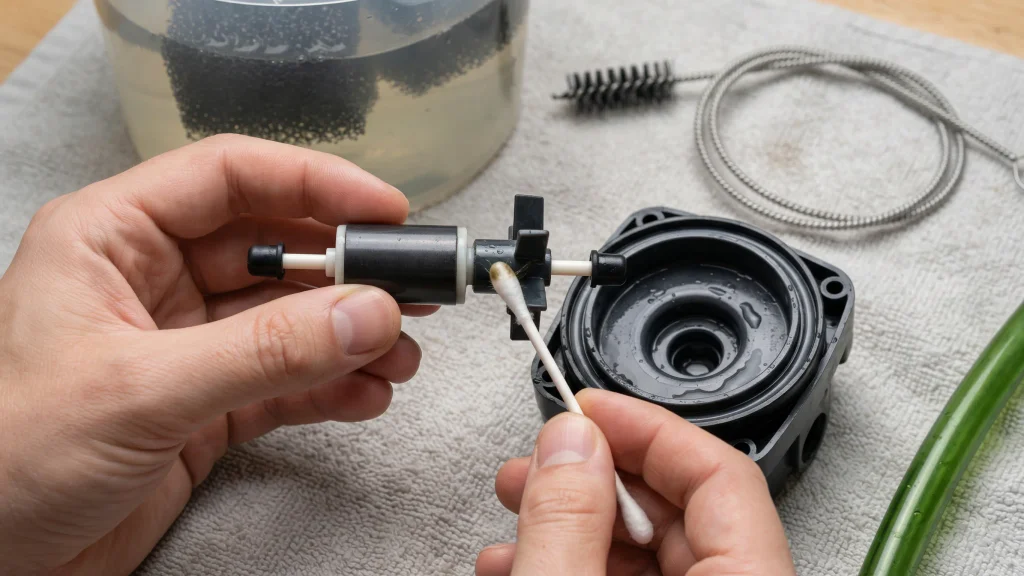
The magnetic impeller is the only continuously moving component inside a canister filter. Even a thin slick of bacterial slime, tangled plant fibers, or calcium scale along the magnet bore creates enough viscous friction to cut pump turnover substantially.
Unplug the unit, remove the motor head, unlock the impeller cover, and pull the rotor straight out—handling it carefully because ceramic shafts resist operational wear exceptionally well yet are brittle and snap if levered sideways. Perform a five-point mechanical inspection:
- Swab the impeller well and magnet core: Use a cotton swab and a soft nylon brush to scrub brown sludge out of the cylindrical motor cavity and straight through the center bore of the magnetic rotor.
- Dissolve hard-water calcium deposits: In mineral-rich, alkaline water (high GH/KH), crusty white calcium carbonate precipitates inside the warm motor cavity and binds the ceramic shaft. Soak the removed impeller, shaft, and impeller cover in plain white vinegar for 15 to 20 minutes, gently brush away softened scale, and rinse thoroughly in clean dechlorinated water before reassembly.
- Flush out substrate grit and pest snails: Fine silica sand stirred up by bottom-dwellers (such as Corydoras or digging cichlids) and tiny Bladder or Ramshorn snails frequently enter the impeller chamber, scoring the magnet sleeve and physically wedging the blades. Inspect and rinse every crevice clean.
- Check blade integrity and rotor attachment: Inspect the plastic propeller blades for chips, cracks, or worn, rounded tips. Hold the magnetic cylinder firmly in one hand and test the plastic propeller blades with the other—if the propeller has split, separated from the magnet body, or spins freely independently of the magnetic rotor, the impeller assembly has failed and must be replaced (consult your specific model’s parts diagram if your filter uses a keyed two-piece rotor).
- Inspect the ceramic shaft and both rubber bushings: Examine the shaft for hairline fractures, scoring, or a tapered wear groove near either tip. Confirm that both small black rubber end-cap grommets (bushings) remain intact, supple, and properly seated at the bottom of the well and inside the impeller cover. Even a slightly canted shaft or worn bushing induces severe high-RPM vibration, rattling, and lost flow. Applying a whisper-thin sheen of food-grade silicone grease along the ceramic shaft and bushings lowers friction and quiets startup chatter.
Fast Isolation Shortcut — The Empty-Canister Test: If flow remains weak immediately after cleaning, lift all media trays out completely, lock the lid, prime the filter with water only, and run it briefly into a bucket. If strong, silent flow returns instantly, your motor head and impeller are completely healthy and the bottleneck sits strictly inside your media stack or basket alignment.
Step 6: Scrub Biofilm Out of Filter Hoses (The Hidden Darcy-Weisbach Killer)
This step answers the single most frustrating mystery behind why is my aquarium filter losing flow rate strength even after you have rinsed every sponge and scrubbed the impeller spotless. Over three to six months of continuous operation, heterotrophic bacteria coat the interior walls of intake and return tubing with a thick, wavy Extracellular Polymeric Substance (EPS) biofilm—a buildup that aquarium maintenance guides report can restrict circulation by up to 50%.
Why does a seemingly modest 1 to 2 millimeter layer of hose slime crush canister turnover? Pipe hydraulics—governed by the Darcy-Weisbach pressure-drop equation—expose the punishing physics of bore narrowing:
hf = f · (L / D) · (v2 / 2g)
Because water velocity (v) climbs inversely with cross-sectional area (D2), frictional head loss at a given flow rate scales roughly with the inverse fifth power of internal pipe diameter (D−5)—while shaggy biological slime simultaneously multiplies pipe wall roughness (f) dramatically compared to clean plastic.
In Darcy-Weisbach hydraulic modeling of a 3-meter run of 16 mm hose carrying 930 LPH (245 GPH) at 25°C, a 2.0 mm biofilm layer cuts open cross-sectional area by 43.8% while multiplying frictional head loss 15.3x—from 0.41 m to 6.20 m.
Because centrifugal canister pumps have modest shut-off head ceilings (typically 1.4 to 2.5 meters), an exponential jump in hose friction forces the pump far to the left on its performance curve, causing real-world aquarium output to collapse until the pipe walls are physically cleared. Restore full tubing hydraulics with three practices:
- Brush both hoses end-to-end 2 to 3 times per year: Disconnect the intake and return lines, carry them to a sink or tub, and push a long flexible double-ended hose brush through every centimeter while flushing with warm tap water until the water runs spotless. Flushing tubing will not harm your cycle—nearly all beneficial nitrifiers inhabit your porous filter media rather than your hoses—and clean pipes also prevent brown biofilm flakes from blasting into the display tank upon restart.
- Eliminate slack, U-loops, and tight bends: Trim hoses so they travel cleanly upward from the canister to the tank rim with minimal droop behind the stand. Practical hydraulic rules of thumb equate every sharp 90-degree bend to roughly 3 feet of straight hose, and bends tighter than a hose’s minimum bend radius can raise local pressure loss by over 50%, turning a hidden pinch behind the cabinet into a severe throttle.
- Weigh smooth vinyl versus ribbed hosing realistically: Fluid-mechanics tests on corrugated ducts show 2x to 5x higher clean-wall pressure drops than smooth tubing of identical bore, and ribbed tubing traps detritus inside corrugations if never cleaned (and is incompatible with standard compression-fit inline heaters). Conversely, Fluval-cited third-party testing reports that its non-kink ribbed hosing maintains a uniform bend radius over tank rims and resists clogging better than tested standard PVC (reporting a 1% flow drop over 7 years versus a 36% drop in 4 months on tested smooth PVC). No independent peer-reviewed aquarium study has benchmarked all aquarium hose brands head-to-head; whichever tubing your filter specifies, match internal hose diameters strictly to factory barbs (typically 12 mm for smaller canisters and 16 mm to 25 mm for large units) and brush them on schedule.
Step 7: Unclog Spray Bars, Lily Pipes, and Inline Equipment Bottlenecks
Even after clearing the intake, media, impeller, and hoses, downstream hardware on the return line can quietly strangle water movement:
- Scrub spray-bar apertures and verify factory nozzles: Algae, snail eggs, and plant slivers gradually seal narrow spray-bar holes. Pop off the end cap, brush out the interior pipe, and clear every aperture with a wooden toothpick. Remember that fewer or narrower spray-bar holes create higher backpressure and reduce total volume; if you want gentler current without choking GPH, slightly widen or add holes along the bar. Also confirm you are running the matched factory return nozzle—for example, fitting a smaller Fluval FX2 or FX4 output nozzle onto an FX6 reduces flow by roughly 10%.
- Descale glass lily pipes safely: Algae and hard-water mineral scale inside tight glass return bends shrink internal bore diameter quickly. Disconnect glassware periodically, soak it in a 50% water / 50% unscented plain chlorine bleach solution for 1 to 4 hours, brush gently with a flexible spring cleaner, rinse exhaustively, and bathe in a generous dose of dechlorinator (water conditioner) before returning it to the tank.
- Audit inline add-ons (UV sterilizers, inline heaters, CO2 reactors, chillers): Every inline chamber spliced into the return hose adds narrow hose barbs, internal baffles, and extra friction head loss—chaining a chiller, UV clarifier, and CO2 reactor onto a single mid-size canister commonly cuts flow drastically. Clean UV quartz sleeves, flush reactor sponges, remove unnecessary elbow fittings, and if circulation remains inadequate, move high-restriction accessories onto a dedicated secondary pump or separate small canister loop. While some hobbyists splice an inline booster pump into a sluggish canister loop, keep total pump output well within the canister’s structural pressure limits (hobbyist guides caution never exceeding roughly double rated GPH) to avoid blowing out canister O-rings and clamps.
Step 8: Understand Closed-Loop Head Height vs. Friction Loss
Many hobbyist articles claim that setting a canister filter on the cabinet floor forces the pump to lift water four feet vertically against gravity, urging aquarists to elevate the canister onto a middle shelf to recover flow. That advice conflates an open sump pump with a closed-loop canister filter.
In an open sump—which relies on precise gravity drain balancing covered in our BeanAnimal overflow freshwater sump guide—the return pump genuinely lifts water from a lower open reservoir up to a higher display tank, overcoming vertical static head every inch of the climb. A flooded canister filter, by contrast, operates as a sealed closed-loop siphon: the downward weight of water descending the intake tube balances the upward weight of water climbing the return hose for a net static head of zero whenever both pipes terminate at the display tank.
Even in a closed loop, however, dropping a canister far below the tank still affects flow and safety for two real engineering reasons. First, longer vertical drops require longer intake and return hoses—aquarium plumbing estimates note that a 6-foot hose run can incur 10% to 15% more friction loss than a 3-foot run, and container-fill tests on canisters such as the Filstar S show measurable step-downs as vertical drop distance grows from level placement to more than four feet below the tank. Second, mounting a canister deeper raises static water-column pressure pressing outward against the main head gasket and primer seals. Manufacturers enforce strict vertical limits—such as 4.5 feet (1.4 to 1.45 meters) from canister base to maximum tank waterline on Fluval 07 models—to prevent seal failure and leaks. Always keep your canister below the aquarium water level, strictly within your model’s maximum vertical drop specification, and verify every link in the sealed circuit from submerged intake strainer through open valves, stacked media trays, impeller chamber, head O-ring, and clear return outlet.
Step 9: Isolate Motor Head Failure (Repair vs. Replace Economics)
If you have cleared the intake, verified full-open taps, purged air, confirmed properly stacked clean media, brushed the hoses, and run the empty-canister test—yet water still barely moves—perform a final electrical and motor-head verification:
- Test the electrical source: Plug a lamp or multimeter into the wall outlet and power strip to rule out tripped GFCIs, malfunctioning timers, or voltage drops across overloaded extension cords.
- Test magnetic drive torque: With the motor head unplugged and dry, remove the impeller completely. Briefly power the motor head for just 2 to 3 seconds while holding the impeller magnet near—not jammed inside—the open well. A healthy stator produces a crisp alternating magnetic pull or visible rotor twitch; a completely dead magnetic field confirms failed internal motor windings.
- Weigh repair versus replacement cost: Impellers, ceramic shafts, rubber bushings, and O-rings are routine wear parts typically costing $8 to $25—always replace wear consumables on an otherwise sound canister. Conversely, if sealed motor windings have burned out or the canister housing is cracked, purchasing a standalone OEM motor head often approaches the price of a brand-new complete filter with fresh hoses, valves, gaskets, and warranty, making full-unit replacement the smarter economic call.
Protecting Beneficial Bacteria While Restoring Filter Flow
Clearing a hydraulic blockage during a canister filter reduced flow fix helps little if careless cleaning crashes your aquarium nitrogen cycle. Inside an established freshwater canister filter, aerobic Ammonia-Oxidizing Bacteria (Nitrosomonas), Ammonia-Oxidizing Archaea, and freshwater-dominant Nitrite-Oxidizing and complete-nitrifying (comammox) Nitrospira species inhabit the brown biofilm anchored to your foams and porous biomedia. Understanding how oxygen thresholds, alkalinity depletion, and microbial succession keep toxic ammonia at zero is covered in depth in our aquarium nitrogen cycle and biofiltration guide.
The Hidden Stagnation Clock Inside a Sealed Canister
Unlike open sponge filters or ventilated sumps that continuously exchange gases with tank water or room air, an external canister is a hermetically sealed, high-demand biological reactor. Nitrifiers are obligate aerobes: nitrification drops sharply once dissolved oxygen (DO) falls below 2.0 mg/L, reaches strong enzymatic efficiency around 3.0 mg/L, and university aquaculture guidelines advise maintaining ≥5.0 mg/L DO alongside total alkalinity above 20 to 50 mg/L as CaCO3 so acid generated during nitrification does not collapse pH below 6.0. Peer-reviewed freshwater microbiology research published via the National Library of Medicine on Nitrospira biofilter bacteria confirms that these slow-growing, oxygen-dependent nitrifiers form the core biological oxidation bed inside established aquarium filters.
The instant you unplug a canister for extended troubleshooting—or during a power outage—fresh oxygenated water stops entering the chamber while dense heterotrophic sludge and nitrifying biofilms continue consuming oxygen rapidly. Those modest dissolved oxygen reserves (roughly 55.0 mg of usable O2 above the 2.0 mg/L stall floor inside a typical 10-liter canister at 25°C) explain why canister cleanliness and water temperature matter so much during downtime: a spotless canister on a cool tank tolerates a brief outage far more safely than a warm, detritus-packed canister where aerobic bacteria burn through 55 mg of usable O2 in under two hours.
Four Non-Negotiable Biofilter Preservation Rules
Technical aquaculture guidance published by the University of Florida IFAS Extension on ammonia and biofiltration emphasizes that aerobic nitrifying bacteria require dissolved oxygen above 5 mg/L and total alkalinity above 20 mg/L to prevent stalled nitrification and dangerous nitrite accumulation. Follow these four biofilter maintenance rules whenever diagnosing why is my aquarium filter losing flow rate strength so your bacterial colony survives intact:
- Rinse mechanical and biological media exclusively in siphoned tank water: While brief rinses in cool, lightly chlorinated tap water rarely wipe out thick biofilms instantaneously, municipal water treated with chloramines (chlorine bound to ammonia, which does not evaporate) penetrates biofilms aggressively—and hot tap water inflicts instant thermal damage. Gently swishing sponges and ceramic media in a bucket of drained tank water removes both chemical and thermal risks at zero cost.
- Keep biomedia submerged and aerated during extended repairs: If sourcing a replacement O-ring or impeller keeps your canister offline beyond 60 to 90 minutes, open the unit, place the biological media baskets inside a bucket of tank water (or hang media bags directly inside the display tank), and run an airstone beneath them. Never restart a sealed canister that has sat unpowered for 4 to 6+ hours without opening and smelling the water first—if it smells foul or like rotten eggs, discard the stagnant canister water, rinse the media gently in tank water to clear decaying biomass, and dose an ammonia binder upon restart. Keeping an inexpensive backup aerator ready from our lab-tested quiet aquarium air pumps guide lets you instantly oxygenate removed filter media and protect your livestock whenever a canister stalls or loses power.
- Never replace all filter media at once: Swapping every sponge and biological chamber simultaneously risks triggering a dangerous mini-cycle (ammonia and nitrite spikes; nitrite is toxic to fish at levels as low as 0.10 mg/L). Replace disposable fine filter floss freely, leave mature biomedia untouched unless visibly choked with impenetrable mud, and if aging biological media must be retired, replace no more than one-third at a time staggered across several weeks. If you accidentally washed your biomedia under chlorinated tap water or replaced too many sponges at once, follow these 5 steps to fix a nitrogen cycle crash immediately.
- Keep flow speed in biological perspective: Recirculating aquaculture research and controlled hobbyist tests suggest that doubling water velocity through a canister adds only roughly 5% to 15% to ammonia-oxidizing capacity, because effective biomedia surface area and dissolved oxygen delivery drive biofiltration far more than extreme turnover speed. A mild 15% flow dip will not collapse your nitrogen cycle overnight—your core objective in restoring strong flow is preventing severe clogging from suffocating the biofilter, clearing dead spots, and sustaining steady gas exchange at the water surface.
Complete Canister Filter Flow Diagnostic Table
Match your exact aquarium filter symptom to its underlying hydraulic or mechanical cause, immediate repair, and preventive maintenance interval using the diagnostic matrix below.
| Symptom | Root Cause | Exact Fix | Prevention Frequency |
|---|---|---|---|
| Flow declined slowly over weeks; sponges look clean | Internal EPS biofilm coating hose walls (D−5 friction surge) | Disconnect hoses and scrub full length with a flexible hose brush and warm water | Every 4–6 months (2–3×/year) |
| Flow drops sharply every 1–2 weeks | Overly fine intake pre-filter (45–60 PPI) or packed filter floss first in flow path | Squeeze pre-filter in tank water; switch pre-filter to 20–30 PPI; place fine floss after coarse foam | Squeeze pre-filter every 1–2 weeks; swap floss every 2–4 weeks |
| Weak flow immediately after routine maintenance | Trapped motor-head airlock, misaligned media basket, or half-open shutoff valves | Verify valves are 100% open; reseat baskets flush; re-prime with outlet above waterline and tilt gently | Every full canister service |
| Weak flow plus steady stream of fine micro-bubbles | Hardened intake rubber hose connector or dry suction-side gasket drawing air (no puddle) | Replace dried rubber intake connector; clean O-ring groove and coat with food-grade silicone grease | Grease O-rings every service; replace connectors every 6–12 months (high-output) or 1–2 years |
| Weak flow with loud rattling, clicking, or grinding | Grit/snails in impeller well, cracked ceramic shaft, missing rubber bushings, or cavitation | Unplug; clear sand/snails; inspect shaft and both rubber end caps; confirm intake valve is 100% open | Inspect and swab impeller well every 6–8 weeks (at each service) |
| Motor hums warmly with zero water output | Seized/calcified impeller, dry-locked air pocket, or detached propeller blades | Unplug; descale rotor/well in vinegar; verify propeller does not spin freely off magnet; re-prime full | Descale in hard water every 3–6 months |
| Flow stays weak even after cleaning media, hoses, and impeller | Blocked intake check-valve ball, clogged spray-bar holes, or overloaded inline add-ons | Flush intake check-valve ball; clear spray-bar holes; clean inline UV/reactor or split onto a dedicated pump | Inspect intake check valve and spray bar every 2–3 months |
| Filter stops every 5–20 minutes, then restarts after cooling | Thermal protection shutoff triggered by impeller drag or stalled bearing | Unplug and cool 20 minutes; clear impeller drag; if cycling persists while clean, replace impeller or unit | Keep spare OEM impeller and bushings on hand |
| Acceptable return flow, yet tank stays hazy with floating debris | Filter bypass from overpacked/warped media baskets or missing inter-basket seals | Remove excess floss; verify basket alignment and seals; confirm brand flow direction | Inspect basket seating at every canister opening |
Proactive Maintenance Schedule to Prevent Future Flow Drops
Memory fades quickly when circulation drops just 2% each week, leaving you wondering why is my aquarium filter losing flow rate strength months later. Stick a strip of masking tape inside your cabinet door to record your clean baseline Timed Bucket Test GPH alongside each canister filter maintenance date:
- Weekly: Check surface ripple visually, inspect the intake strainer for shed leaves or snails, and verify aquarium water covers all intake pipe joints.
- Every 1 to 2 weeks: Squeeze external or modular pre-filter sponges gently in siphoned tank water during routine water changes.
- Every 2 to 4 weeks (or at a ≥30% bucket-test flow drop): Replace dense fine filter floss, gently squeeze coarse mechanical sponges in tank water, and confirm quick-disconnect taps reopen fully.
- Every 6 to 8 weeks (at each full canister service): Swab the impeller magnet, ceramic shaft, and motor cavity; inspect spray-bar holes and intake check valves; clean and re-grease the main motor-head O-ring with food-grade silicone lubricant.
- Every 4 to 6 months: Scrub both intake and return hoses end-to-end with a flexible tube brush, descale hard-water mineral buildup on impeller components, and clean any inline UV quartz sleeves or glass lily pipes.
- Every 6 to 12 months (or 1 to 2 years on lighter-duty setups): Inspect intake rubber hose connectors, suction cups, O-rings, ceramic shaft, and impeller bushings for hardening or wear, replacing aging consumables proactively—while leaving established biological ceramic or K1 media largely undisturbed unless visibly smothered in sludge.
Conclusion
Executing a lasting canister filter reduced flow fix seldom requires buying a new pump or dismantling your aquascape. Once you separate normal loaded-filter circulation from genuine hydraulic loss with a 60-second bucket test, working methodically through your intake strainer, valve orientation, trapped airlocks, media stack, magnetic impeller, and biofilm-coated hoses restores strong, dependable flow almost every time.
Above all, safeguard your living biofilter during maintenance: rinse media solely in old tank water, aerate submerged biomedia if repairs run long, and keep intake lines unrestricted so your pump runs cool, quiet, and cavitation-free for years.
Frequently Asked Questions
Why is my canister filter flow still weak even after I cleaned all the sponges?
When sponges are spotless yet output remains sluggish, the bottleneck almost always sits outside the media trays. The four most overlooked culprits are brown EPS biofilm narrowing the filter hoses, a slimy or calcified impeller bore, quick-disconnect valves sitting three-quarters open, or a wedged snail or jammed ball check valve inside the intake pipe.
Should I ever use Vaseline or petroleum jelly on my canister filter O-ring?
No—never apply Vaseline, petroleum jelly, or vegetable oil to aquarium rubber seals. Petroleum and organic oils swell and degrade rubber elastomers, causing gaskets to flatten, crack, draw suction-side air, and eventually leak. Use only pure food-grade or aquarium-safe silicone grease.
How can I slow down a canister filter that is too strong without damaging the pump?
Always leave the intake (suction) valve 100% open to prevent pump cavitation. Either disperse the return current inside the tank with a multi-hole spray bar or glass lily pipe, or gently throttle strictly the outlet (discharge) valve within your manufacturer’s published limit (such as up to 45 degrees or 50% flow reduction on a Fluval AquaStop valve).
How long can a canister filter stay unplugged during troubleshooting before beneficial bacteria die?
A freshly cleaned canister on a cool tank holds enough oxygen for several hours, whereas a warm, heavily soiled canister can turn hypoxic in as little as 1.5 to 2 hours, with accelerating bacterial die-off past 4 to 6 hours. If troubleshooting takes longer than one hour, transfer your biological media baskets into a bucket of aquarium water with a running airstone.
When should I replace my canister filter impeller instead of just cleaning it?
Replace the impeller assembly (along with its rubber shaft bushings) if thorough cleaning fails to resolve loud rattling or weak flow, if the blades are chipped or worn smooth, if the ceramic shaft is cracked or worn to a taper, or if the plastic propeller has split or spins freely independently of the magnetic rotor.

2 thoughts on “Canister Filter Reduced Flow Fix: Restore Full GPH Fast”